Online guide to learn cross stitch

In this academy guide you can learn what cross-stitch is, how to do it, what materials you need and how to take your first steps in this fun technique.
CONTENT
- Introduction to cross stitch: what it is, what it is used for, practical ideas for cross stitch embroidery.
- Materials needed for cross-stitch embroidery: threads, needles, fabric, frames.
- Cross stitch diagrams: how to interpret them.
- How to do cross-stitch embroidery: tutorial, types of stitches and tips.

What is cross stitch?
Cross stitch is an embroidery technique that consists of stitching a fabric in the form of consecutive crosses, through which an image or motif is created. This, combined with changes in color, allows us to create an infinite variety of representations on a fabric.
What is cross stitch used for?
With the cross-stitch embroidery technique we can represent an image, a border, a geometric shape, words or numbers on a fabric...
Using a wide variety of different shades we can even create a painting with a great level of detail and realism. We can also make simpler and very pretty projects such as a small flower.
Practical ideas for cross-stitch embroidery
The usefulness of making cross-stitch creations is very broad, as wide as our imagination desires.
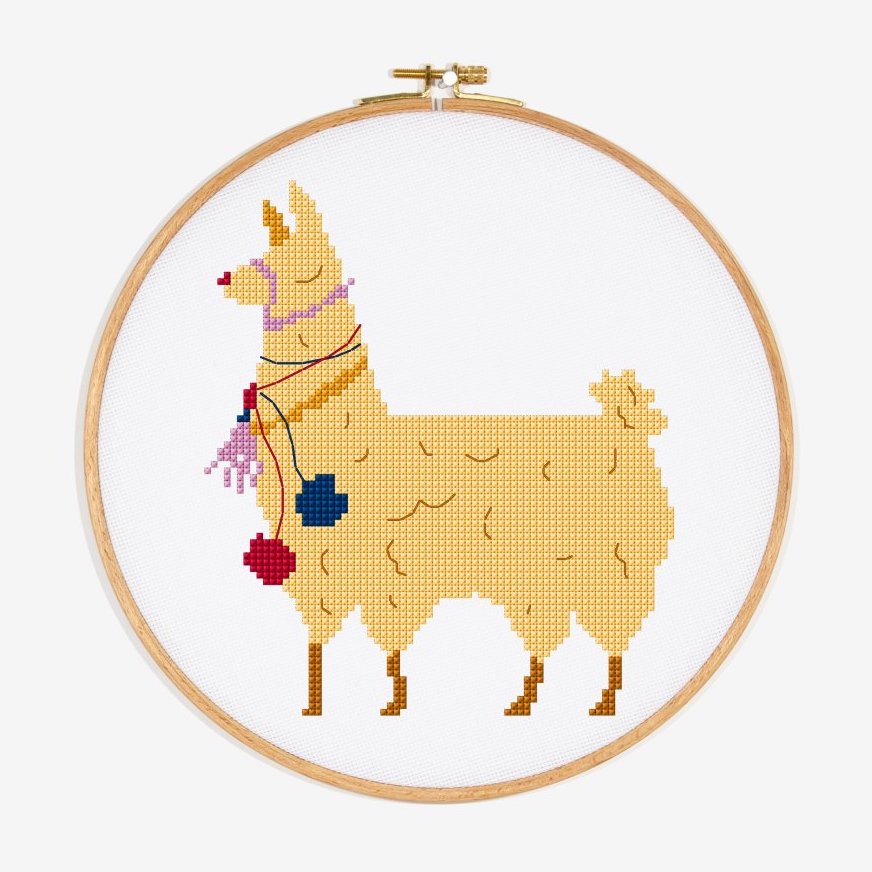
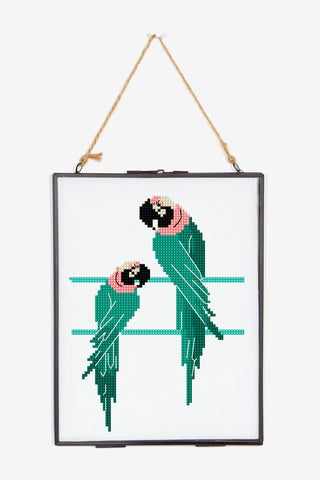
For example, we can create a Goya painting and hang it on the wall. There are also many simpler ideas to create decorative elements to decorate our walls or shelves.
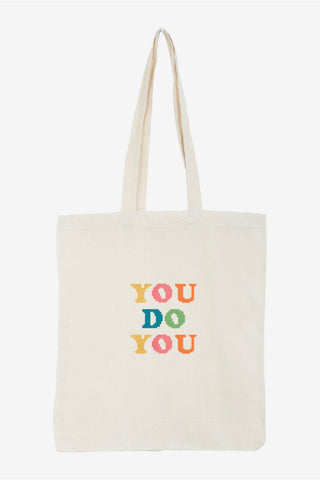
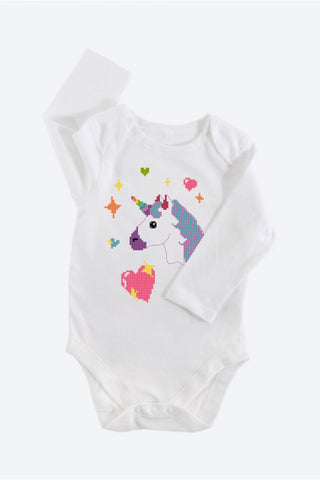
We can personalize many items of clothing or accessories for the little ones, such as drawing our baby's name on their bib, or embroidering an airplane on their favorite backpack.
We could also decorate accessories around the house, making a cross-stitch border to decorate our cushions.
Our clothing items can bear our unique stamp by adding cross-stitch embroidered elements.
As you can see, there is a world of possibilities to put this embroidery technique into practice. Cross stitch is a very entertaining and satisfying activity, with which you can create unique projects.


Materials for cross stitch embroidery
The main materials to be able to carry out your cross-stitch work are the following:
- Cross stitch threads
- Cross stitch needle
- Cross stitch fabric
- Embroidery frame
Cross stitch threads
Cross-stitch threads are usually sold in skeins of a few metres, as you may only need a small amount of thread of each colour. Cross-stitch embroidery often combines threads in various shades to achieve beautiful colour effects or create more realistic images.
The most commonly used thread for cross stitch is the so-called Mouliné, a 100% cotton thread. The most commonly used is the one marketed by DMC, which you can find in our shop. This thread offers a wide range of 500 different shades, to recreate the most vivid and detailed images.
-> SEE CROSS STITCH THREADS IN THE STORE

Cross stitch needle
To work the thread, you will need a cross-stitch needle. Cross-stitch needles are small and thin, with a rounded tip so they can completely pierce the fabric you are working on.
You can find different needle numbers. The needle number indicates the eye size and thickness of the needle. The higher the number, the smaller the eye and the thinner the needle.
You can find cross stitch needles in our store.
-> SEE CROSS STITCH NEEDLES IN THE STORE

Cross stitch fabric
The most commonly used fabric for cross stitch is Aida, a fabric with equidistant holes through which the needle can be inserted to create diagonal and cross-shaped stitches.
You can find cross-stitch fabric in our store, in the Accessories section.
-> SEE CROSS STITCH FABRIC IN THE STORE

To calculate the fabric you need, check the measurements indicated on the diagram you are going to make. To this measurement, add between 8 and 10 centimeters of margin around (bottom, top, left and right).
Please note! It is not recommended to wash the piece of fabric before starting the project, as this will tighten the holes and make it more difficult to embroider.
To choose the right fabric, keep in mind that Aida fabrics have a count value. Counts are the number of squares available per inch of fabric . Each square or hole represents a cross stitch. On the fabric detail, the number of counts will be indicated (11, 14, 16, 18...). The higher the number, the smaller the holes in the fabric. The recommended fabrics to start cross stitching are Aida fabrics 11 to 14 counts.
TIP: Before you begin your work, locate the center of the fabric to determine where you should place the stitches so that the result is centered. To find the center, fold the fabric in half, and then fold it in half again. The point where the two folds meet is the center.
Embroidery frame
You may find it helpful to frame your fabric when working with it. A frame is usually a hoop-shaped piece that holds the fabric in place, so that the fabric is evenly stretched and helps you create even stitches.
However, you can also do cross-stitch embroidery without a frame, holding the fabric with your hand.
You can find embroidery frames in our store, in the Accessories section.
-> SEE EMBROIDERY FRAMES IN THE STORE
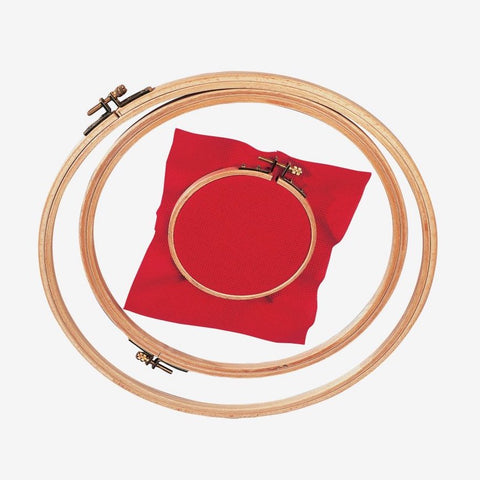
To attach the fabric to the hoop, loosen the screw on the hoop, separating the rings. Place the inner ring on a flat surface, with the fabric flat on top (the area to be embroidered will be inside the circle). Then, place the outer ring on the hoop and the fabric will be secured. Press the screw again to tighten.
When you are going to leave the work for another day, remove the fabric from the frame, so that it does not take shape, and replace the fabric when you are going to continue with the embroidery.
How much thread do I need for cross-stitch?
If you are following the instructions on a chart, it will usually tell you how much thread of each color is needed.
If you don't have any pattern instructions, to calculate the amount of thread you'll need for your cross-stitch project you'll have to take into account two main variables: the tension in the stitch and the distribution of colours.
The most practical way to calculate how much thread you need for your stitches is to make a sample: make stitches on the fabric until you finish a skein, and see how many stitches you have made. You can then calculate the thread you need by counting the stitches on the embroidery chart.
It is common for cross stitch thread skeins to be 8 metres long. However, make sure when you make your purchase that the thread you are choosing actually contains that length, so as not to have any surprises when you do your work and run out of thread. DMC Mouliné skeins contain 8 metres of thread length.
Separate the strands of cross stitch thread
Cross stitch thread is made up of several twisted strands, and it is easy to separate them. For example, DMC Mouliné thread is made up of 6 strands.
Depending on the pattern you are making, it may tell you that you need fewer strands. For example, the pattern may tell you that you only need two strands of embroidery floss. In this case, you will need to separate the strands you need.


Cross stitch charts
A cross-stitch diagram shows the pattern to be made on a grid. The diagram will usually also indicate the colours you need, the amount of thread, the number of strands, the recommended fabric and the measurements of the result.
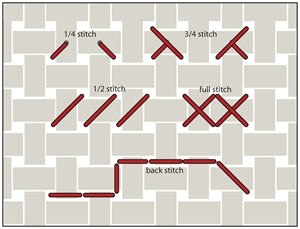
Each square in the diagram corresponds to a square on the fabric. The squares that contain symbols are the squares where you need to make stitches. Each symbol will indicate what type of stitch you need to make.

The types of stitches can be:
- Cross stitch : you will have to complete the cross stitch when the square is completely colored or covered by the symbol.
- Half point : represented by a colored square in the middle or a diagonal line that crosses the square from one end to the other.
- Three-quarter point : Represented by a triangle or miniature symbol.
- Quarter point : It is represented by a line that goes from one end of the square to the center or a small symbol that reaches the center of the square.
- Backstitch : represented by a line.
- French knot : It is represented with a dot.

How to do cross stitch embroidery
Now that you have your materials ready and know how to read your cross-stitch chart, you are ready to start embroidering your work.
Please note that cross stitch is worked in horizontal rows starting from the left.
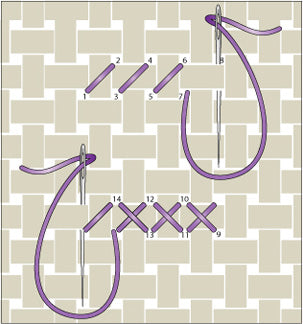
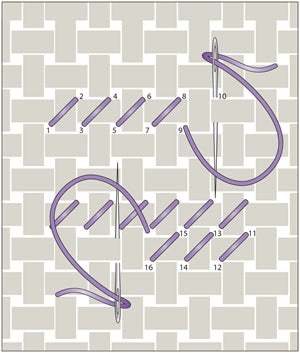
Cross stitch
To make the stitch, follow these steps using the illustration:
- Bring the needle to point 1, which is the hole at the bottom left of a square of fabric.
- Continue with the needle to point 2, which is at the top right of the fabric square.
- Repeat the steps, bringing the needle as indicated in the illustration through points 3 to 8.
- To complete the row, we will turn from right to left, and in this way we will complete the crosses.
- To do this, we will take the needle out through point 9 and do the same thing again but in the opposite direction. We put the needle in through point 10 and take it out through point 11. And so on until we complete the points.
Start cross stitch embroidery
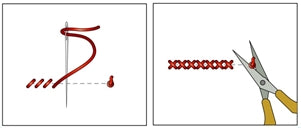
To begin the embroidery, tie a knot at the end of the thread and bring the needle from the beginning to the end, approximately 3 cm from the starting point, placing the thread along the same line that you plan to embroider.
Bring the needle up to the front of the fabric, to the starting point of your first cross stitch. Begin to embroider towards the knot, making sure to cross over the back thread with each stitch to secure it.
When your stitch reaches the knot, bring up the knot, cut it close to the fabric, and continue embroidering.
Closing a thread
To finish a thread, bring the threaded needle under the last stitches on the back of the fabric, and cut off the excess.
After rethreading the needle to continue, simply bring the needle under several stitches along the back to secure the thread and continue embroidering.
Half point
The half stitch is a stitch, making only half of the cross.
To make a half stitch, bring the needle up from the back of the fabric to 1 and down to 2. Bring it up to 3 and down to 4. Finish the row.
The back row is embroidered on the reverse side and is embroidered from right to left.
Here the needle goes up to 11 and down to 12, then up to 13 and down to 14.
Finish the return row and repeat the embroidery sequence until the area is embroidered as shown in the picture.
Quarter point
To embroider a quarter stitch, bring the needle up from the bottom left hole of the fabric square and down to the center of the square.
The quarter stitch can be embroidered from any corner of the square on an Aida cloth.
Three-quarter point
A three-quarter stitch is shaped like a T. You make a quarter stitch first, then a half stitch. Three-quarter stitches can be stitched in any direction.
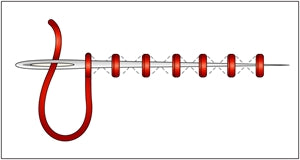
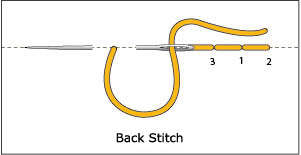
Backstitch
The topstitching is worked from right to left.
To start, bring the needle to point 1 and return underneath to point 2.
Go to the left and bring the needle to 3 and back down to 1. Continue the embroidery sequence.
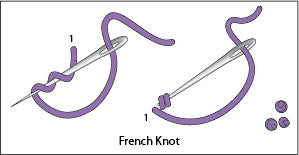
French knot
Tips for cross stitch embroidery
- Try to keep the tension on your stitches even. That is, don't make some stitches tighter than others. At first, it's normal to find it difficult to make all the stitches even, but with a little practice you'll soon get the hang of it.
- When making a diagram, draw the main elements of the graph first, and then the background of the image. You may also find it helpful to do the darker colors first, then move on to the lighter colors.
- If you notice that the thread is twisting while you are stitching, drop the needle and allow the thread to straighten out again before continuing to embroider.
- To make a quarter stitch or three-quarter stitch, use a smaller needle size.
Now that you have the basics to make your cross-stitch projects, follow these 3 steps to ensure fun:
- Buy your materials in our EMBROIDERY section
- Choose a free design in the DIAGRAMS section
- Enjoy creating your project!

5 comments
Muy buena información
Muy interesante el tema.
Estoy con deseos de aprender
Excelente explicación.. Gracias.
Me. Encata el Punto en Cruz
Gracias por la clase.. Es importante para mejorar los bordados..
Buenos días los felicito por tan grandiosa información que nos brindan por estos medios.
Quiero solicitar a usted me recomienden una aplicación para pasar fotos de personas a punto de cruz donde me aparezcan los colores de hilos que voy a utilizar; pues me gusta trabajar en fotos de personas en punto de cruz y no he podido encontrar una aplicación para esto les agradezco su buena información sobre el presente y reintegro mis felicitaciines