C2C Crochet (Corner to Corner). Complete Guide. Tips and Tricks
C2C Crochet
C2C is short for Corner to Corner. This exciting technique involves knitting squares diagonally in an unusual direction: starting at one corner of the work, we knit diagonal rows until we end up at the opposite corner.
It is an exciting technique that allows us to knit and interpret thousands of pixelated or square patterns and make infinite drawings in our work.
The result is beautiful! I love it and it's ideal for drawing while knitting.
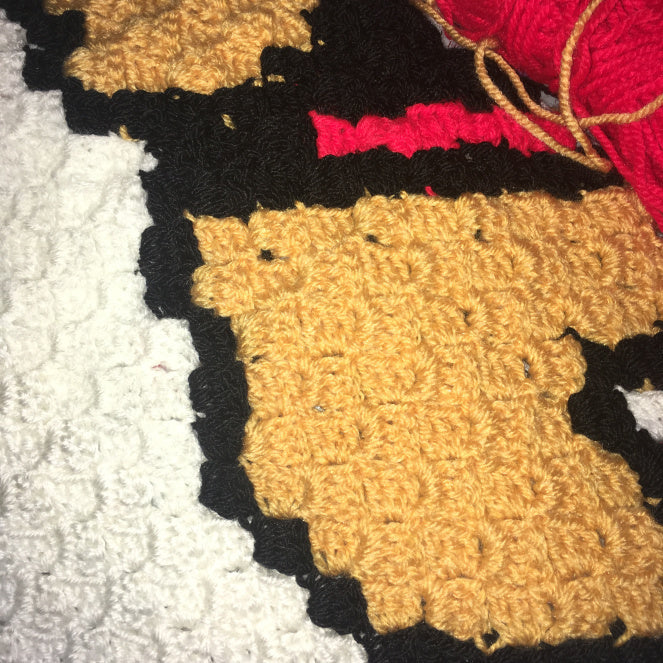
I'm showing you a job I'm halfway through:

Examples of diagrams for knitting in C2C
We can knit any grid diagram, taking into account that the complexity of knitting it will depend on:
- Number of squares (by size)
- Number of color changes (the more color changes, the more balls we must keep together at the same time and well organized)


The possibilities of C2C
The possibilities for knitting using this technique are endless. There are thousands and thousands of grid patterns that we can knit, we can also create our own patterns on a grid sheet, or we can use any cross stitch pattern to knit it using C2C.
We can for example draw:
- rows in different colors

- sequences of motifs

- images

Needle
To knit in C2C, I recommend using the recommended needle size for the yarn you are going to use. Never use a larger one, but always a smaller one, since we want it to be dense, especially in the stitches of the work where we are hiding another yarn while we knit.
Thread
As for the yarn to use, we can knit with any material. However, keep these tips in mind for an ideal result:
Combine threads
It is very important that the threads you are going to combine in the project are of the same thickness and texture. Use the same type of thread, in a different color. If we mix different materials in the project, the squares will not be uniform, they will not have the same size and the final appearance of the project will be seriously affected.
Size of the work
Keep in mind that the size of your project will be determined by the combination of the number of squares and the thickness of your thread. To get your project the size you want, test several squares with a thread that you think will fit it. Measure the resulting squares (your sample) and calculate by multiplying the number of squares to find out what the final measurement will be. If your calculations tell you that it will be larger than you want, change to a thinner thread so that the measurement of each square is smaller, and vice versa.
Organize the balls well
If you use several colors in your work, we will later see that we will have to keep all the balls attached to the fabric (to minimize cuts and finishes), so it is important that you keep them untangled at all times and well placed, because if not, a few rows later... Oh, what chaos! We will have knots, tangled threads... and it will be very tedious to fix it.
How to read a diagram
Once you have chosen the pattern you are going to knit, I first recommend that you print out the pattern and cross out the rows as you go. We will consider each row as the diagonal lines of the pattern, like this:

Note that you can start the diagram from any corner you want. The result will be the same. I usually start them from the bottom left, but it's up to you.
Let's knit!
To knit in C2C, we will use chain stitches, double crochet and slip stitch. Check out our tutorials if you have any questions about how to do these stitches.
To illustrate this tutorial, we are going to weave this diagram in C2C:

Front row
Our first row will be the first square in a corner:

- We knit six chains
- In the fourth space from the needle we knit a double crochet (to leave free the three chain stitches of height usual for a double crochet row).
- We knit a double crochet in each of the two remaining chains, leaving us with a total of three double crochets: our first square (3×3).

Increases. Our second row
Increases are necessary to grow a square in width or length. As is the case with the second row.
Our second row is one square wider and one square taller, so we need to increase both at the beginning of the row and at the end.

Our second row is two pink squares. So we need to change colors. Basic color changes are made by closing the previous stitch with the new color.
In this case, we will close the high stitch of the first square (white) with thread of the new color (pink).
Be careful! We do not cut the white thread.

- INCREASE : Rep. the first square: Crochet six chains. In the fourth space from the needle, crochet a double crochet. In the next two chains, crochet another double crochet in each one (total 3 double crochets).
- We join the first square with a slip stitch, inserting the needle into the gap formed by the last stitch of this previous square.
- We knit 3 chains, and inserting the needle into the same space where we made the slip stitch, we make 3 double crochet stitches.

Row 3 (start)
The following rows of increase (rows three and four) would be made following the same steps explained for row two. Continuing the tutorial, we will illustrate step by step how we would advance the project.

1) Our first square is pink, so we continue with the same color, turn the fabric and increase:
INCREASE : Crochet six chains. In the fourth space from the needle, crochet a double crochet. In the next two chains, crochet another double crochet in each one (total of 3 double crochets).
2) We join the square on the left with a slip stitch, inserting the needle into the gap formed by the double crochet stitch of the previous square. But be careful! As the next square is going to be white, we close the slip stitch with the new colour (white) . To do this, we bring the white thread that we left loose before, attached to the fabric.
3) We make the white square (we knit 3 chains, and inserting the needle into the same space where we made the slip stitch, we make 3 double crochets). When we knit the double crochets, we hide the white thread that comes from the left at the bottom of the stitches (as we knit with the tapestry technique). We do this like this: when we insert the needle into the space, we leave the thread that we want to hide on top of the needle.

Color changes
To make color changes, we could cut the thread with each change, but at the end of a project we would find many ends to sew and fix, and it is very cumbersome. Therefore, we use the threads that we left loose before to continue now.
Here are some tips to minimize cuts and finishes when changing colors:
Do not cut
For now, don't cut the thread when you change a color. Leave it hanging and on the next round see if you can reuse the thread without cutting it. The more you use, the firmer the fabric will be and the less work it will be for you to finish off all the cut threads at the end.
Take advantage only of the threads that come from your left.
When you are knitting a row and you need to change colors, use the thread from the previous row of that color, only if it is on your left, so that you can hide it as we explained above using the tapestry technique. If you bring it from the right you cannot hide it like this, and there will be a crossed thread in the middle of the drawing.
If you can't take advantage of a previous thread
If we have to change color and we don't have any thread to reuse in the previous row (of that color, and to our left), start a new ball or, from the ball of that color, cut part and create a new ball.
Keep the balls of yarn tidy
As you have seen, we may find several balls of the same color attached to the fabric, plus other balls of the rest of the colors, so it is important to keep all of them and the threads well organized, placed and untangled.
Finish off the cut strands
When you finish your work, tie off all the cut strands, leave the knots tight and sew the remaining 15 cm of thread from each cut strand with a wool needle. I hope that with these tips you will have as few ends as possible!
Row 3 (finishing)
4) We knit the white square hiding the thread as we explained previously.
5) We join with a slip stitch to the next square, closing it with thread of the new color (pink) and we knit the pink square, closing the last double crochet with white because the first square of the next row will be white.

Row 4
We turn the work and knit the fourth row all in white in the same way.
- INCREASE Square : Crochet six chains. In the fourth space from the needle, crochet a double crochet. In the next two chains, crochet another double crochet in each one (total 3 double crochets). Join with a slip stitch.
- Three basic squares (knit 3 chains, and inserting the needle into the same space where you made the slip stitch, make 3 double crochet stitches). Join each square to the one on its left with a slip stitch (except the last one).

Decreases. Our row 5
To decrease the width or length, we must do the following: knit 3 slip stitches over the 3 stitches of the previous square (in place of knitting a square).

To make our row 5, at the beginning we see that we are not going to increase the width anymore, now we go up. So we will make a decrease.
- We turn the fabric and make 3 slip stitches over the double crochets of the last square of the previous row (we will close the last slip stitch in pink because the next square to be knitted will be pink). We see that we have knitted the profile instead of a square.
- We knit a basic square in pink. We join with a slip stitch. We knit a square in grey. We join with a slip stitch. We knit a square in pink. We join with a slip stitch.
- To decrease at the end of a row , we don't have to do anything special. Simply, the last square is joined with a slip stitch, instead of having made an extra one as before, which we left unjoined.

Row 6
We already know how to make our sixth row.

- DECREASE : Three slip stitches.
- Two basic pink squares joined with a slip stitch to the one on the left.

Row 7

To make our seventh row (which is the last square):
- DECREASE : three slip stitches (we close the last one in white).
- Basic square in white. We join with a slip stitch.
- We cut and close the work.

I hope you enjoyed and learned from this guide. Now put into practice everything you have learned from corner to corner crochet!
1 comment
Muy interesante muchas gracias, despejaste muchas dudas